
Endgame Side Quests
Welcome to the Endgame Side Quest Content page for Final Fantasy XIII. This section of the walkthrough has been set up to guide you through the completion of all the optional content at the end of the game in an optimized manner describing which areas of the game you should focus on as you make your way through the more challenging content.
This section of the guide is intended to be used after you have completed the story of Final Fantasy XIII. In other words, you have reached the end of Chapter 13 and have unlocked the maximum level of your character’s Crystariums (level 10).
For starters, let’s do some catch-up to ensure that you have completed all the optional content up to this point. You have likely completed all of this content already, but do a quick review and make sure that these items have been taken care of before we move on to the remaining content. You should have:
✓ Completed Missions 1 through 34
Check out the Missions page for more information if you haven’t completed all these Missions:
A link to the “Missions” section of the strategy guide with walkthroughs of all 64 available Missions.
✓ Repaired Bhakti
Travel back to Oerba if you forgot to repair Bhakti. You may also want to review the Bhakti side quest page to familiarize yourself with some of the other side quests and completionist content that Bhakti is involved in:
Side Quests

A guide on where to find the spare parts to repair Bhakti and an overview of the achievements and rewards it is involved with.
✓ Optional Areas
Completing all the available Missions up to Mission 34 will have taken you to all these areas, so you should have visited them all by now:
Side Quests
How to obtain the ability to ride Chocobos and how to hunt for treasure.
Side Quests
Returning to the Mah’habara Subterra later on in the game to complete two additional Missions.
Side Quests
How to reach Aggra’s Pasture and a short overview of the tasks you can complete there.
With all of that done we should be all caught up and ready to begin the remaining side quest content. The first step is to do some preparation…
Preparing Your Party
There are three things to take care of that involve preparing your party for some of the more difficult challenges that await you. They include upgrading your character’s weapons, equipping beneficial accessories and doing any remaining CP farming that you need to in order to get your party leveled up.
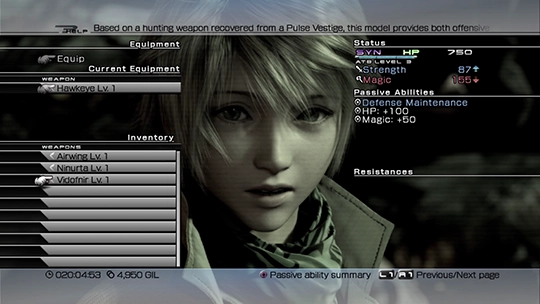
Upgrading Your Weapons
You may have already begun the process of upgrading your party member’s weapons, but it’s at this point in the game where you should plan out the process of upgrading your character’s weapons to their Ultimate Weapon. This is otherwise known as their Tier 3 upgrade.

All the weapons that you find in the game can be upgraded a maximum of three times and, once they reach the third tier, they all upgrade to the same weapon. For example, Lightning’s weapons will upgrade according to the following chart:
| Tier 1 | Tier 2 | Tier 3 |
|---|---|---|
While Lightning’s weapons may all upgrade into the same weapon, ![]() Omega Weapon, the stats on this weapon will be different depending on which Tier 1 weapon you used to upgrade to Tier 3. This means that there are preferred weapon choices that are considered Lightning’s “best weapon” and, while this can be somewhat subjective, a case can usually only be made for 1 or 2 weapons for each character.
Omega Weapon, the stats on this weapon will be different depending on which Tier 1 weapon you used to upgrade to Tier 3. This means that there are preferred weapon choices that are considered Lightning’s “best weapon” and, while this can be somewhat subjective, a case can usually only be made for 1 or 2 weapons for each character.
If you did any Sacrifice Farming in Chapter 13, you probably already have enough money to upgrade at least one of your character’s weapons into their Tier 3 ultimate weapon. But which character should you start with and which weapon should you upgrade?
First and foremost, you should begin with the party members that you will be using the most. If you’re still following the Optimized Party Setup Guide and using Fang, Lightning and Hope, you should obviously begin with those three characters first.
One of the primary benefits of upgrading a character’s weapon into their Tier 3 version is that that character will gain access to their sixth and final ATB bar, which increases the number of actions they can perform in battle. Due to the amount of damage that she deals, Fang is your best choice to upgrade first, and her weapon choice is fairly obvious.
You should upgrade her ![]() Taming Pole into a
Taming Pole into a ![]() Venus Gospel and then into
Venus Gospel and then into ![]() Kain’s Lance as this will greatly increase the amount of damage she puts out. For more information on how to do this, check out the two sections:
Kain’s Lance as this will greatly increase the amount of damage she puts out. For more information on how to do this, check out the two sections:
Tips and Tricks
A full guide on how to upgrade your weapons and accessories using components you obtain in the game.
Tips and Tricks
A guide on which weapons perform best for each character in each of their roles.
Creating and Equipping High-Level Accessories
There are two important types of accessories that you should obtain before you work your way through the remaining endgame content. The first group of accessories are those that improve leveling and farming efficiency and the second are those that increase the offensive and defensive stats of your characters.
Starting with the first group, the accessories you should obtain include the following:
| Accessory | Details |
|---|---|
| This accessory can be obtained by completing |
|
| You should have a few of these in your inventory already. One can be obtained from completing |
|
| This accessory can be created by upgrading a |
|
| This is the least important of the four efficiency-focused accessories as it just increases the odds that a Shroud will drop. One can be obtained by completing |
The second group of accessories is intended to increase the effectiveness of your characters in battle.
| Accessory | Details |
|---|---|
| This accessory is useful for a few very specific battles which are very difficult if you don’t have resistance to earth-based magic. Focus on getting three of these accessories first before stocking up on the others because the other accessories, while beneficial, are not as much of a requirement as these rings. Spend your Gil on this first. You can obtain a Gaian Ring by upgrading a |
|
| These handy accessories increase resistance against both physical and magic damage making them incredibly efficient as a defense-based protection for your characters. You can upgrade them to their maximum level by using 36 However, while the price is high (840,000 Gil in the |
|
| You may already have one of these in your possession depending on how much digging for treasure you have done with your Chocobo. If not, consider spending more time wandering around the plains of the Archylte Steppe on your Chocobo. Check out the Chocobos side quest page for more information. |
Farming and Spending Crystogen Points (CP)
It’s at this point of the game where the Missions get a lot more difficult. You now have access to Stage 10 of each character’s Crystariums and it may be worth farming some Crystogen Points to start filling out the new sections that have become available.
These two farming locations are not anywhere near as efficient as they used to be but they can be useful for helping you get your characters caught up:
Tips and Tricks
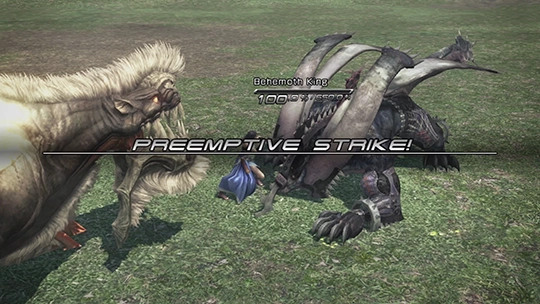
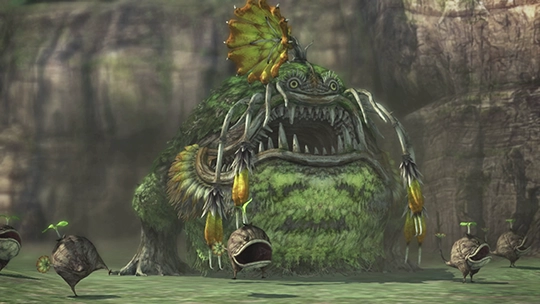
Taking on a Behemoth King and Megistotherian that can be quickly defeated in a three-way battle in the Archylte Steppe.
Tips and Tricks
Repeatedly attempting Mission 24 in Taejin’s Tower for some quick Gil.
Titan’s Trials and the Faultwarrens
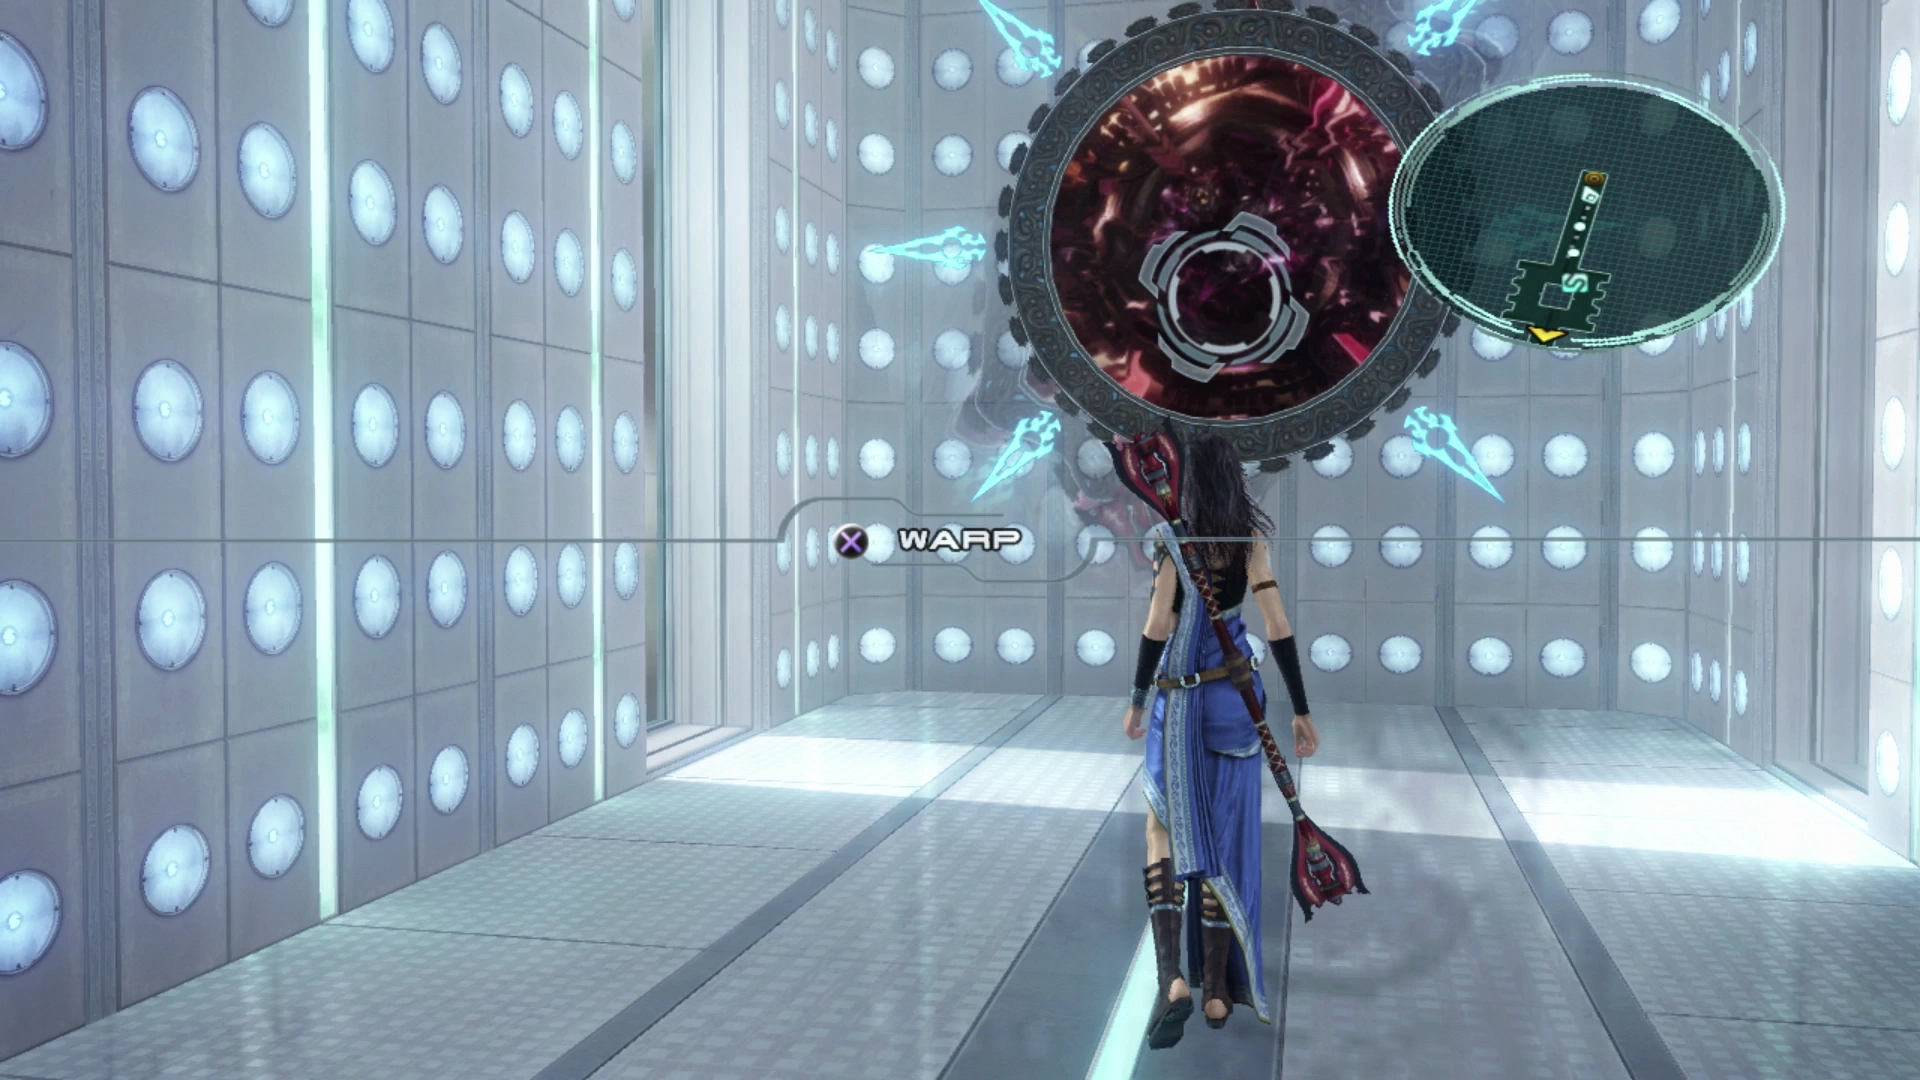
It’s now time to move on to the next set of Missions. Mission 35 through Mission 51 are part of the Titan’s Trials which can be found in an area called the Faultwarrens. This is the area that was locked behind the Cie’th Paling wall that was opened after completing ![]() Mission 34 - Zenobia, the Butcher.
Mission 34 - Zenobia, the Butcher.
Check out the Titan’s Trials / Faultwarrens section for more information:
Side Quests
A subset of Missions that take place in the Faultwarrens area that involve defeating enemies spawned by the mighty Titan fal’Cie.
Continuing the Missions
The next set of Missions can be completed outside the Titan’s Trials / Faultwarrens and involves clearing all the Missions up to Mission 63 but there are some considerations you should look at before completing this one or the last one.
Cie’th Stone Missions
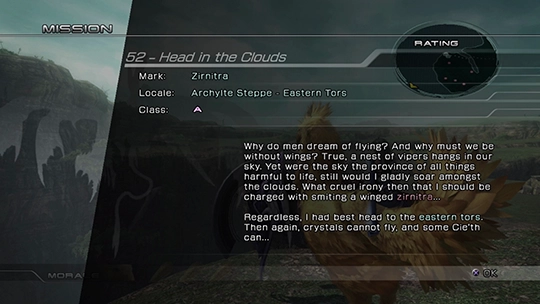
Zirnitra in the Eastern Tors of the Archylte Steppes.
The next Mission will require you to travel back into the Mah’habara Subterra Optional Zones.
Cie’th Stone Missions

Zirnitra again in the Pass of Paddra area of the Yaschas Massif.
The next Mission is a particularly challenging one and is one that you may want to consider leaving until later on in the game unless your characters are very well leveled and you have spent a fair bit of time farming already:
Cie’th Stone Missions

Gigantuar in the Eastern Tors of the Archylte Steppe.
You may have already completed Mission 55 if you obtained the Early Growth Egg. If not, you can do it next:
Cie’th Stone Missions
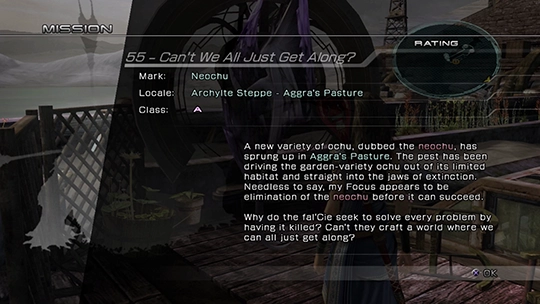
Neochu in the Aggra’s Pasture are of the Archylte Steppe.
The Circle of Cie’th Stones
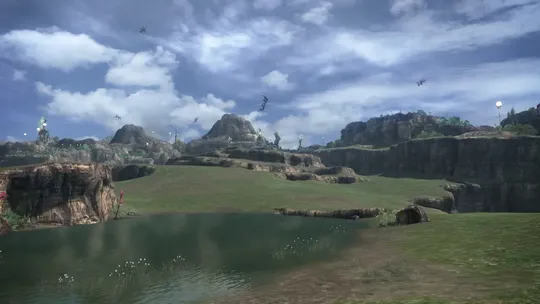
During your travels through the Archylte Steppe, you may have noticed a circle of Cie’th Stones in the Eastern Tors area. The next set of Missions involves completing each of the available Missions in this circle. Note that you may have already completed some of the easier ones (noted with an asterisk) at the end of Chapter 11:
Cie’th Stone Missions
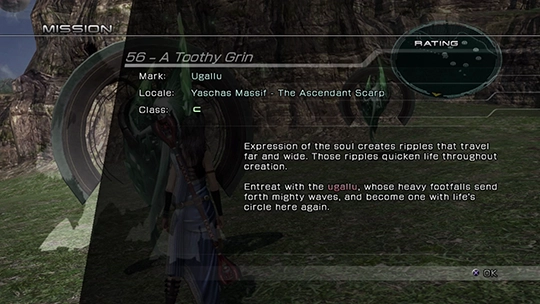
Ugallu in the Ascendant Scarp area of the Yaschas Massif.
Cie’th Stone Missions
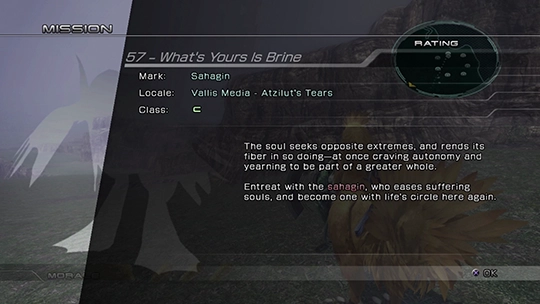
Sahagins in the Atzilut’s Tears area of Vallis Media.
Cie’th Stone Missions
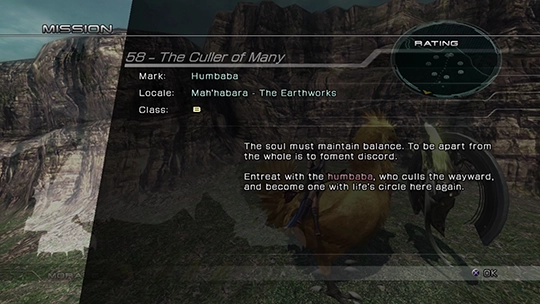
Humbaba in the Earthworks area of the Mah’habara Subterra.
Cie’th Stone Missions
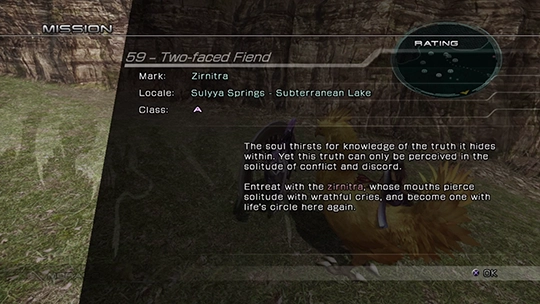
Zirnitra again in the Subterranean Lake of the Sulyya Springs.
Cie’th Stone Missions
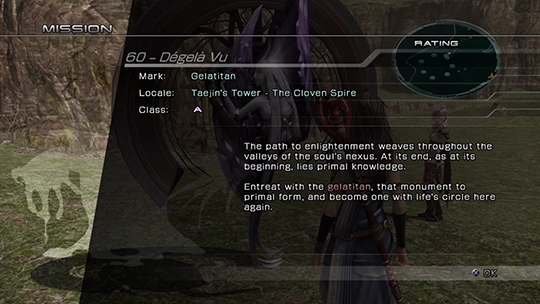
Gelatitans at the top of the Cloven Spire / Apex of Taejin’s Tower.
Cie’th Stone Missions
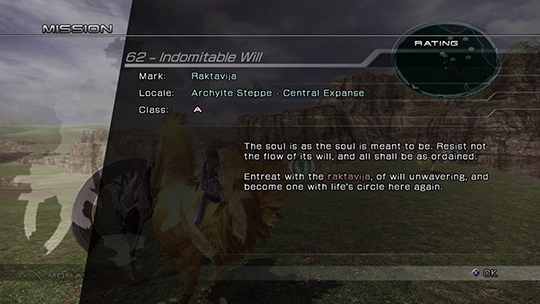
Raktavijas in the Central Expanse area of the Archylte Steppe.
Cie’th Stone Missions

Adamantortoise in the Eastern Tors of the Archylte Steppe.
The Final Mission
You’re presented with another choice here. Mission 64 is the last and most difficult Mission which can be made much easier if you spend some time farming and leveling up your characters through the remaining sections of their Crystariums.

If you would like to make this Mission easier and plan to do a fair bit of Gil farming and pursue the Treasure Hunter Achievement/Trophy, consider leaving this Mission until later.
Cie’th Stone Missions

Vercingetorix in the Paddraean Archaeopolis of the Yaschas Massif.
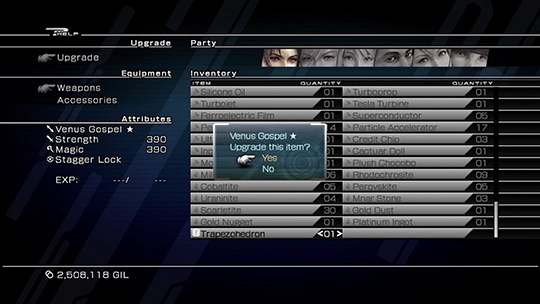
Adamantoise Farming (Platinum Ingots and Trapezohedrons)
The last thing to do is to start farming for Gil. One of the best methods to do this is to farm Adamantoise which has a chance of dropping ![]() Platinum Ingots, which sell for 150,000 Gil, or in rare cases, they might drop a
Platinum Ingots, which sell for 150,000 Gil, or in rare cases, they might drop a ![]() Trapezohedron.
Trapezohedron.
You will need six ![]() Trapezohedrons to upgrade each of your character’s weapons into their Ultimate Weapons, and each one costs 2,000,000 Gil to purchase in the
Trapezohedrons to upgrade each of your character’s weapons into their Ultimate Weapons, and each one costs 2,000,000 Gil to purchase in the ![]() R&D Depot shop, so every time you get lucky and have one drop, you will save a massive amount of Gil!
R&D Depot shop, so every time you get lucky and have one drop, you will save a massive amount of Gil!
At this point, you need to be very strategic about how you are farming and how you are spending your Gil. Use the Adamantoise Farming page as well as the Treasure Hunter achievement guide page below to help you focus your efforts:
Tips and Tricks
Quickly engaging and defeating Adamantoise enemies out in the Archylte Steppe for a shot at Platinum Ingots or a Trapezohedron.
Side Quests
A guide outlining how to obtain the most difficult Achievement/Trophy in the game: Treasure Hunter. Contains farming tips and a list of treasure to obtain.
Treasure Hunter and Bhakti
Once you have obtained all the available weapons and accessories in the game you will need to head back to Oerba to visit Bhakti to obtain the Treasure Hunter Achievement/Trophy which is a very significant achievement if you manage to do it. Congratulations!
Achievements and Trophies
The last thing to do is make sure you have obtained all the Achievements and Trophies available in the game. The most challenging ones to obtain involve obtaining a 5-Star Battle Results Rating for many of the fights, but this is made much easier once you have the ![]() Gold Watch accessory from completing
Gold Watch accessory from completing ![]() Mission 64 - The Doomherald. Check out the Achievement/Trophies section for more tips on how to obtain the rest.
Mission 64 - The Doomherald. Check out the Achievement/Trophies section for more tips on how to obtain the rest.

A complete list of the achievements and trophies that you can obtain in the PlayStation, Xbox, and Nintendo Switch versions of the game.
Congratulations!
You have completed all the endgame content. Thank you for reading this strategy guide! Be sure to return to Jegged.com if you move on to any of the other Final Fantasy titles! Check out the Final Fantasy portal to see which games are available.